
Natural Cherry Jam (No Pectin Added)
- felichiccuisine

- Jun 17, 2025
- 7 min read
Refinement in every spoonful. No artificial additives.

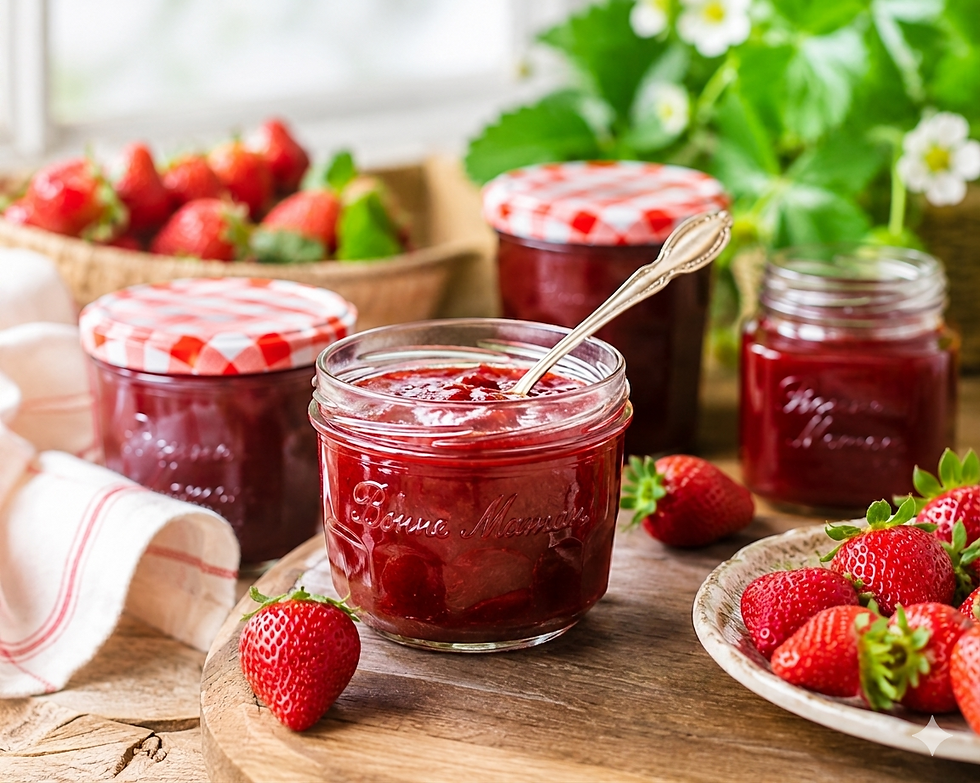
There’s something quietly luxurious about a jar of homemade cherry jam, the way deep ruby fruit settles into a glossy syrup, capturing the very essence of summer in its purest form. Made slowly, with patience and care, this Natural Cherry Jam celebrates whole fruit, gentle sweetness, and the timeless beauty of traditional preserving.
Each spoonful carries the brightness of ripe cherries, softened by a delicate hint of lemon and the natural richness that comes only from real ingredients - no pectin aded, no shortcuts, just fruit transformed by time and heat into something elegant and deeply comforting.
It’s the kind of preserve that feels both rustic and refined, perfect spread over warm toast, layered into desserts, or simply enjoyed straight from the jar.
In this recipe, I’ll show you how to prepare a traditional cherry jam using only simple, natural ingredients and a few essential techniques that make all the difference. No commercial pectin, no artificial additives, just fruit, sugar, lemon, and time.

The Essence of Summer, Captured In a Jar
Cherry jam is, for me, the true taste of summer in a jar. It begins with cherry season, markets full of colour, hands turning red from pitting fruit, and kitchens slowly filling with the smell of something sweet and homemade.
What makes cherry jam so special is its simplicity. Whole cherries soften gently as they cook, staying beautifully intact while releasing their deep ruby juice into a rich, glossy syrup. The result is naturally thick, smooth, and full of flavour.
It doesn’t need anything complicated. Just ripe fruit, a little lemon to lift the flavour, and time. Like many traditional jams, it’s not rushed, and that’s exactly what gives it its depth and elegance.
A classic, homemade cherry jam made without gelling agents or artificial additives, where every spoonful tastes like pure summer.

Small Secrets for Perfect Cherry Jam
✔ Choose firm, fully ripe cherries: Pick cherries that are ripe but still firm. They hold their shape beautifully during cooking and don’t break down into a mushy compote.
✔ Don’t rush the maceration: For the best flavour and texture, let the cherries rest overnight with the sugar. This allows them to slowly release their natural juices, creating a rich syrup and helping the jam develop its natural set.
✔ Don’t skip the lemon juice: Lemon does more than brighten the flavour. It balances the sweetness, helps maintain the texture of the fruit, supports natural setting, and contributes to safe preserving.
✔ Cook it low and slow: Good jam is never rushed. Gentle simmering allows the syrup to thicken naturally while keeping the cherries whole and beautifully intact.
One of the lovely things about cherry jam is that cherries naturally contain more pectin than strawberries. Because of this, the jam sets more easily and develops a smooth, slightly velvety texture, all without the need for added gelling agents.
About Sugar and Preserving
Traditional jam recipes often use a 1:1 fruit-to-sugar ratio. I usually use around 750 g of sugar for every 1 kg of cherries, depending on how naturally sweet the fruit is.
It’s worth keeping in mind that reducing the sugar too much can affect how well the jam keeps over time. Sugar does more than add sweetness — it also plays an important role in texture, stability, and preservation.
For a cherry jam that sets beautifully, stores well, and stays true to the traditional method, finding the right balance is key.

Sterilising the Jars and Lids
If you want your cherry jam to keep beautifully for months, proper jar sterilisation is a step worth taking seriously. It helps preserve the flavour, colour, and freshness long after cherry season has passed.
Start by washing the jars thoroughly in hot, soapy water, then rinse them well to make sure no residue or lingering smells remain.
To sterilise the jars, you can:
Place them in the oven at 110–120°C (230–250°F) for 10–15 minutes;
Boil them for a few minutes in simmering water;
Or use the traditional steam sterilising method.
Sterilise the lids separately by gently simmering them in water, then allow them to dry naturally.
It’s a simple step, but one that makes all the difference when it comes to preserving homemade jam safely and keeping that fresh summer flavour sealed inside each jar.

It’s important to fill the jars while they are still slightly warm, and to pour in the jam while it is hot. This helps create a natural vacuum seal, which supports proper preservation.
How to Make Traditional Cherry Jam, Step by Step
1. Preparing the cherries
✔ Wash the cherries thoroughly, ideally with the stems still attached to prevent them from absorbing excess water.
✔ Once well drained, remove the stems and carefully pit the fruit, trying to keep the cherries as whole as possible.
✔ This step takes a little patience, but it makes a big difference to the final texture and appearance of the jam.


2. Layering with sugar
✔ In a large stainless-steel pot, layer the cherries and sugar alternately until all ingredients are used. Cover and leave at room temperature overnight, or for about 12–24 hours.
✔ During this time, the cherries will naturally release their juices, and the sugar will begin to dissolve, forming a fragrant, deeply coloured syrup.

3. Sterilising the jars
✔ Meanwhile, prepare the jars and lids. Wash them thoroughly with hot, soapy water, then rinse well.
✔ To sterilise, place the jars in the oven at 110–120°C (230–250°F) for 10–15 minutes. Sterilise the lids separately by gently simmering them in water, then leave them to air dry.

4. Cooking the jam
✔ The next day, add the lemon juice, zest, and a few small pieces of lemon to the cherries.
✔ Stir gently with a wooden spoon and place the pot over medium heat. At first, stir carefully until the sugar has completely dissolved.
✔ As the jam comes to a boil, a foam may form on the surface.
✔ Skim it off regularly to keep the syrup clear and clean.

5. Knowing when the jam is ready
✔ Continue cooking over medium-low heat, stirring occasionally, until the syrup thickens and the cherries become slightly translucent and deeper in colour.
✔ To test if the jam is ready, place a small spoonful of syrup on a cold plate. If it holds its shape and doesn’t spread immediately, it has reached the right consistency.
✔ Avoid overcooking, so the fruit stays intact and the syrup remains smooth and delicate.

6. Filling the jars
✔ Pour the hot jam into sterilised jars using a ladle. Make sure there are no air bubbles and wipe the rims clean before sealing.
✔ Close the lids immediately and turn the jars upside down for a few minutes to help create a vacuum seal.

7. Storing the jam
Once completely cooled, store the jars in a cool, dark place. The jam keeps well for up to six months. After opening, it should be refrigerated.
Frequently Asked Questions (FAQ)
Question | Answer |
What type of cherries is best for jam? | The best cherries are ripe, firm, and aromatic. Slightly firmer varieties hold their shape better during cooking and give the jam a beautiful texture. |
Do I need pectin? | No. Cherries naturally contain more pectin than many summer fruits, which helps the jam set without any added gelling agents. |
Why let the cherries sit with sugar overnight? | This step allows the fruit to release its natural juices, creating a more aromatic syrup and helping the jam develop a better set. |
Can I reduce the amount of sugar? | Yes, but not too much. Sugar is not only for sweetness, it also helps preserve the jam. For best results, use at least 700–750 g sugar per 1 kg of cherries. |
How do I know when the jam is set? | Use the cold plate test: place a small drop of syrup on a chilled plate. If it holds its shape and doesn’t spread immediately, it’s ready. |
Why does foam form during cooking? | This is completely normal. The foam should be skimmed off to keep the syrup clear and the final jam clean and glossy. |
How should I store the jam? | Sterilise jars properly, fill them while the jam is still hot, and seal tightly. Store in a cool, dark place for best preservation. |
How long does it last after opening? | Once opened, keep the jar refrigerated and consume within a few weeks. |
Can I use cherry jam in desserts? | Yes, it’s perfect for pancakes, tarts, cookies, cakes, or simply served with butter and fresh bread. |
Love this recipe? Please leave a comment. Your feedback, suggestions, and adaptations are very helpful to other bakers!

Natural Cherry Jam
(No Pectin Added)
A delicate jam with whole cherries in a ruby, fragrant syrup, slowly cooked from simple, natural ingredients.
Yield: 4–5 jars (250 ml each) | Prep: 35 min | Maceration: 10–12 h | Cook: 25–40 min |
Total: 11–13 h
Ingredients
1 kg ripe cherries
750 g granulated sugar
1 untreated lemon (juice + a little zest)
4 x 250 ml jars
Method
Prepare the cherries: Wash the cherries and let them drain well. Remove stems and pits, keeping the fruit as whole as possible.
Macerate overnight: In a large pot, layer cherries and sugar alternately. Cover and leave at room temperature overnight, until the fruit releases its juices and a syrup forms.
Sterilise the jars: Wash jars and lids thoroughly, then sterilise in the oven at 110–120°C for 10–15 minutes. Sterilise lids separately in boiling water.
Cook the jam: Add lemon juice and a little zest to the cherries. Bring to a gentle boil over medium heat, stirring lightly at first until the sugar dissolves. Skim off any foam that forms.
Test for setting point: Simmer until the syrup slightly thickens. Place a drop on a cold plate, if it holds its shape and doesn’t spread, the jam is ready.
Fill the jars: Pour the hot jam into sterilised jars. Seal tightly and turn upside down for a few minutes to help create a vacuum seal.
Store: Let the jars cool completely, then store in a cool, dark place.
Enjoy!
Notes |
1. Use ripe but firm cherries for the best texture.
2. Overnight maceration is key for a rich, natural syrup.
3. Lemon juice helps with flavour, setting, and preservation.
4. Skim foam for a clean, glossy finish.
5. Jam thickens as it cools — don’t overcook.
6. Always use sterilised jars and seal while hot.

Have you tried making this Natural Cherry Jam? I'd love to hear about your experience! Share your thoughts and any creative twists you added to the recipe in the comments below. Or, tag me on Instagram (@FeliChic'Cuisine) when you post your recipe creations. Let's inspire each other. Thank You!


Comments